Conditional Settings
Create dynamic forms using conditions and logic. Show or hide fields, merge component settings, and adjust field behavior based on user interactions. These features add flexibility and control, giving users a more personalized and structured form-filling experience.
Conditional Show and Hide
Conditions are set on a per-field basis. To configure a show/hide condition, open the component field settings and click the Conditional tab.
There are two different methods to write conditions, Simple and Advanced.
Simple
The Simple Conditional tab allows the user to show or hide fields based on user input, or value selection of other fields on the form. These conditions are configured using a code-free UI. The following settings are available to configure conditionals.
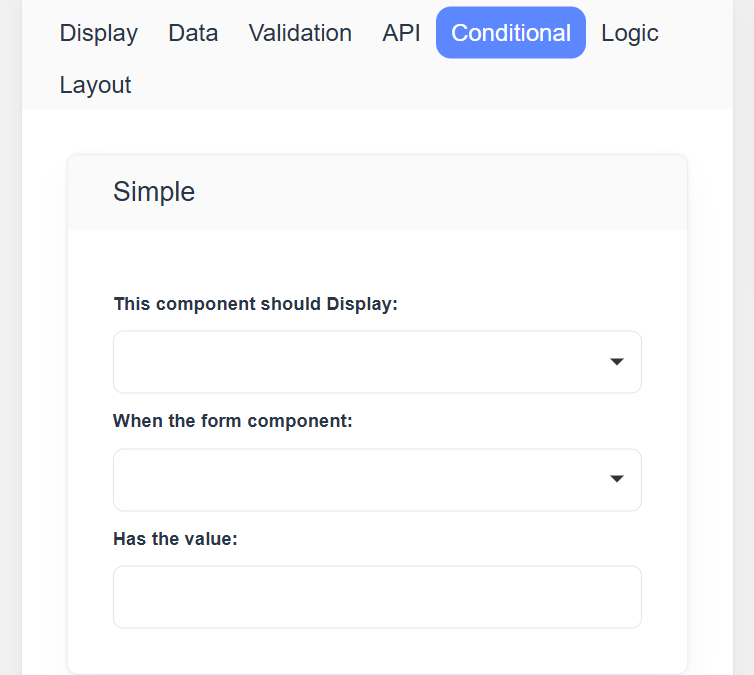 This component should Display: Select whether to True the field or False the field when the conditions are met.
When the form component: Select what component within the form will execute the condition.
Has the value: The string value the field needs to contain for the condition to activate. If the conditional field uses static values—such as those from a Radio or Select component—the predefined options will be displayed in the Value dropdown as the trigger value for the condition.
Example: Simple Conditional Logic Using a Radio Field
This example demonstrates how to use a Simple Conditional setting to show or hide a field based on another field’s value.
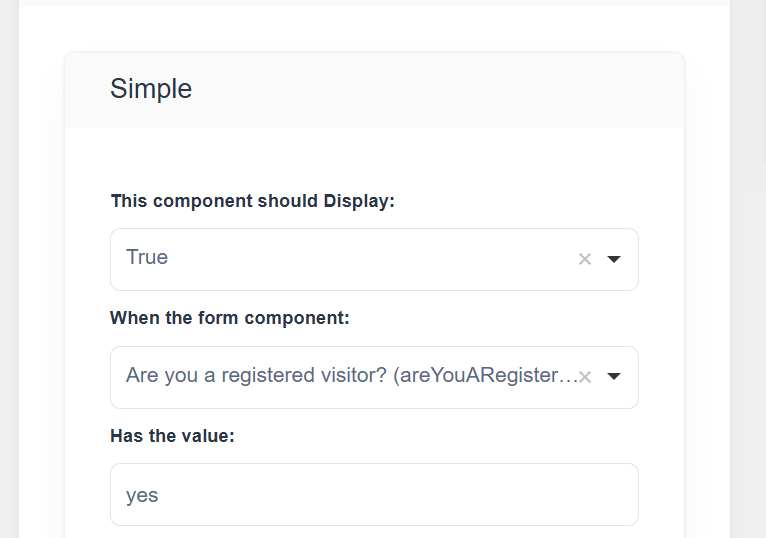
We’ll create a condition that displays the Visitor ID field only when the user selects “Yes” for the Are you a registered visitor? radio question.
Step-by-Step Guide
Step 1: Add a Radio Field
- Drag and drop a Radio component into your form.
- In the Display tab, configure the following:
- Label:
Are you a registered visitor? - Key:
isRegisteredVisitor - Values:
- Label:
Yes→ Value:Yes - Label:
No→ Value:No
- Label:
- Label:
Step 2: Add a Text Field
- Drag and drop a Text Field component below the radio field.
- In the Display tab, set:
- Label:
Visitor ID - Key:
visitorId
- Label:
- Open the Conditional tab for the Visitor ID field.
- In the Simple Conditional section, set:
- This component should Display:
True - When the form component:
Are you a registered visitor? - Has the value:
yes
- This component should Display:
Step 4: Save and Test
- Click Save to apply the configuration.
- Changes Reflect Only in Usermode.
- When you select Yes, the Visitor ID field appears.
When you select No, the field remains hidden.
Advanced Conditional
Advanced Conditional Logic allows you to control the visibility, enable/disable state, or other behaviors of a form field based on complex conditions. Unlike simple conditions, which only compare a single field to a fixed value, advanced conditions let you use multiple fields, operators, and custom logic to define when a field should appear or behave in a certain way.
Key Features
-
Multiple Conditions – Combine multiple fields and values using logical operators like AND, OR, and NOT.
-
Custom JavaScript Logic – Write custom expressions to evaluate complex scenarios, e.g., show a field only if a visitor is registered and their purpose of visit is “Meeting”.
-
Dynamic Behavior – Fields can be shown, hidden, enabled, or disabled dynamically based on user input in real time.
-
Flexible Form Design – Supports both simple user-friendly rules and highly advanced conditional rules for power users.
Example: Advanced Conditional Logic with Multiple Conditions
This example demonstrates how to use Advanced Conditional Logic in a form to show or hide a field based on two or more conditions.
We’ll configure the Visitor ID field to appear only when:
- The user selects “Yes” for Are you a registered visitor?, and
- The user selects “Meeting” as the Purpose of Visit.
Step-by-Step Guide
Step 1: Add a Radio Field
- Drag and drop a Radio component into your form.
- In the Display tab, configure:
- Label:
Are you a registered visitor? - Key:
isRegisteredVisitor - Values:
- Label:
Yes→ Value:Yes - Label:
No→ Value:No
- Label:
- Label:
Step 2: Add a Select Field
- Drag and drop a Select component below the radio field.
- In the Display tab, set:
- Label:
Purpose of Visit - Key:
purposeOfVisit - Values:
- Meeting
- Delivery
- Interview
- Other
- Label:
Step 3: Add a Text Field
-
Drag and drop a Text Field component below the previous fields.
-
In the Display tab, configure:
- Label:
Visitor ID - Key:
visitorId
- Label:
-
Open the Conditional tab of the Visitor ID field.
-
Scroll down to the Advanced Conditional section.
-
Enable Advanced Logic and enter the following JavaScript code:
show = data.isRegisteredVisitor === 'Yes' && data.purposeOfVisit === 'Meeting';
JSON logic
JSON Logic can be used instead of JavaScript for advanced conditions.
{
  "if": [
    {
      "and": [
        { "==": [ { "var": "isRegisteredVisitor" }, "Yes" ] },
        { "==": [ { "var": "purposeOfVisit" }, "Meeting" ] }
      ]
    },
    true,
    false
  ]
}