Configure - PDF Settings
Overview
The PDF Settings feature allows you to design, configure, and attach PDF templates to your forms.
These templates can be used to generate printable or downloadable PDF versions of form submissions.
Each form can have one or more PDF templates that define how data should appear in the final output.
How to Use
-
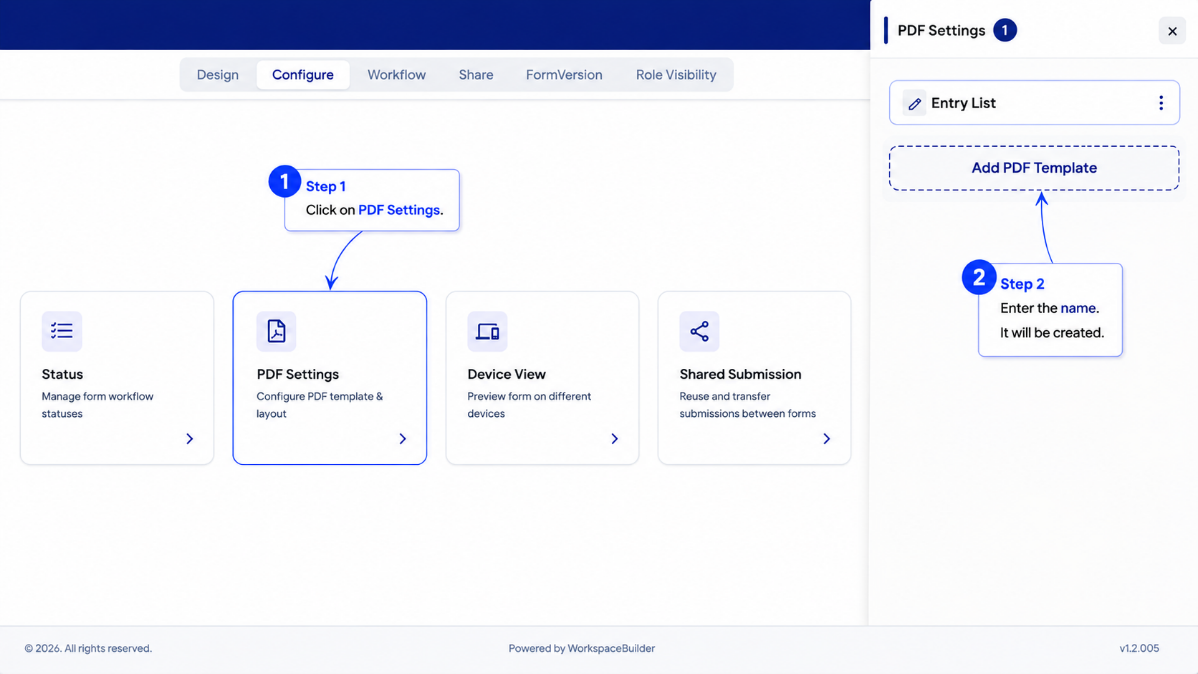
Navigate to Configure Tab
- After completing your form design, go to the Configure tab at the top of your screen.
-
Open PDF Settings
- Click the PDF Settings block.
- A sidebar will appear on the right side of the screen.
-
Add PDF Template
- Click Add PDF Template to create a new PDF configuration.
- A default Untitled template will appear.
- You can manage this template using the three-dot menu (⋮) with the following options:
- Rename → Change the template name.
- Duplicate → Create a copy of the current template.
- Delete → Remove the template.
-
Edit the Template
- Click the template name (e.g., Untitled) to open the PDF Designer view.
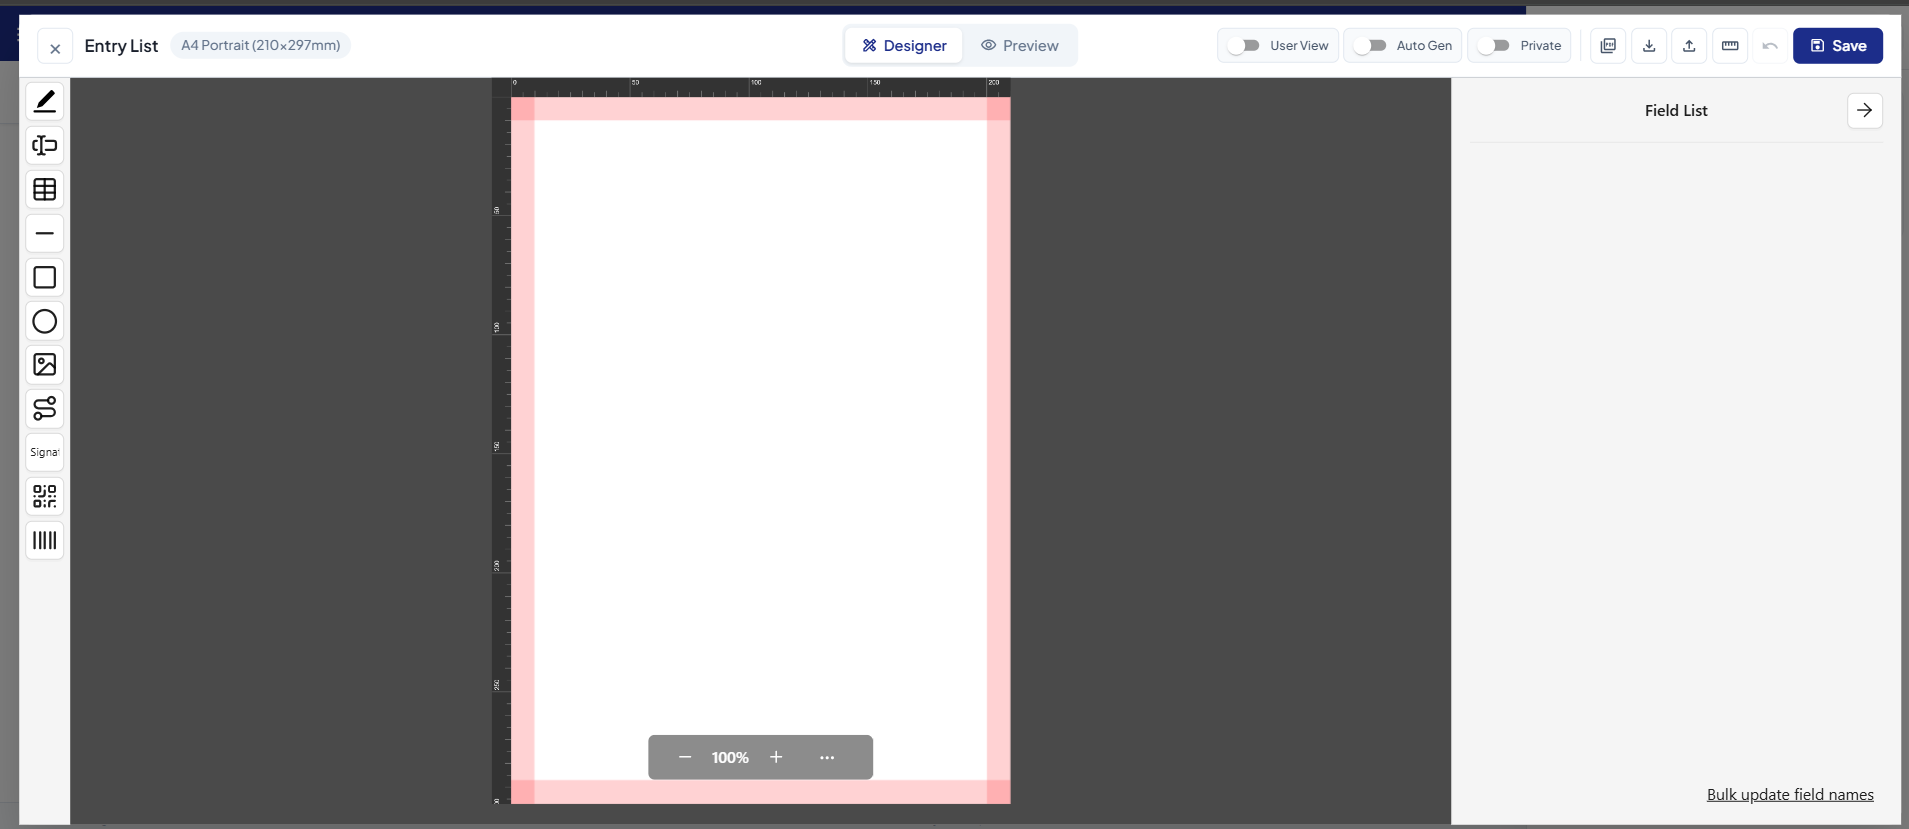
PDF Designer Interface
Once the template is opened, you will see:
- A canvas area to design your PDF layout.
- A toolbar on the left containing draggable elements (text, image, shapes, signature, etc.).
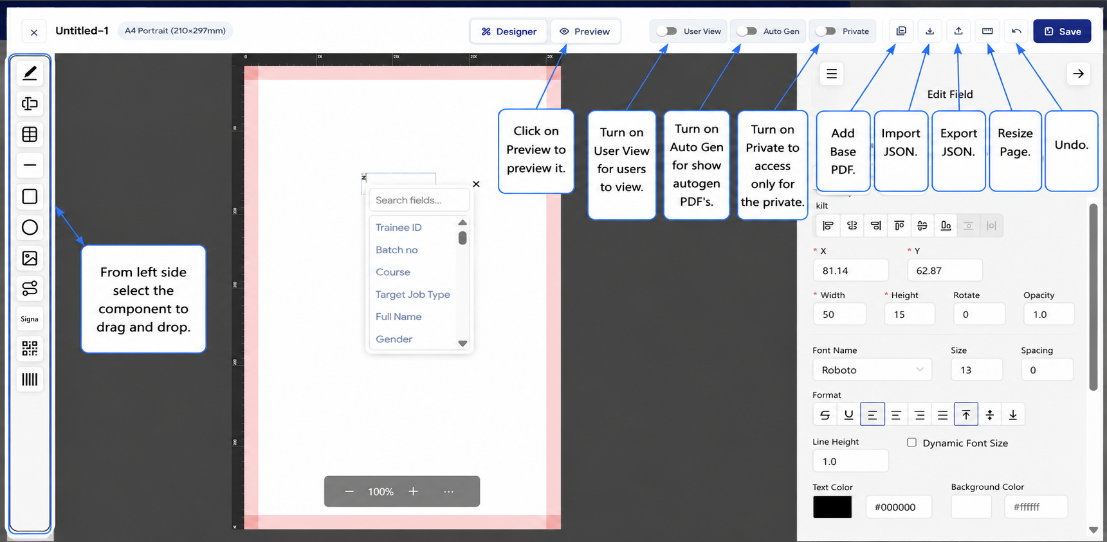
- A property panel on the right where you can edit component attributes like:
- Type (Text, Image, etc.)
- Name (e.g.,
field1) - Editable / Required toggles
- Position (X, Y)
- Dimensions (Width, Height)
- Font and alignment controls
Top Toolbar Actions
-
Add Base PDF →When you click Add Base PDF, a modal opens where you can either upload your own PDF by clicking the + icon or choose from available demo templates.
-
Download Template → Export your designed template for backup or reuse.
-
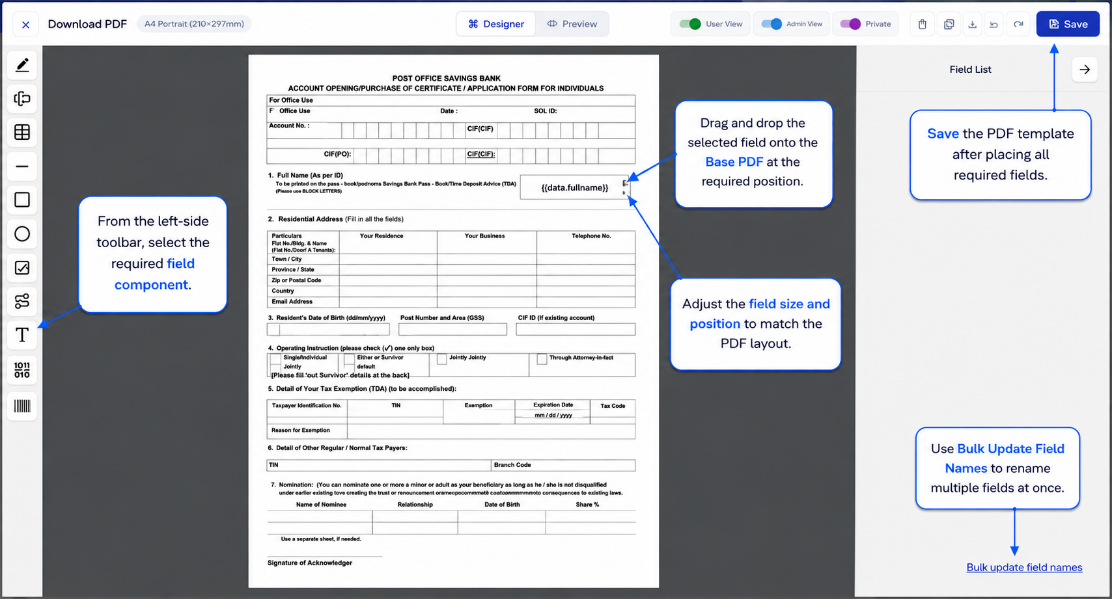
Save → Save your current PDF layout and configuration.
-
Reset Design → Clear all components and start fresh.
Note:
In Text Field and Multi Variable Text components, typing#will open a list of available form fields.
Select the desired field to dynamically bind it to the PDF.
This ensures that when users open the Mantine Table in User Mode and click the Edit button,
the corresponding submission data automatically appears in the PDF preview for that field.
Components
- Text Field – Used to enter single-line text such as names, addresses, or short inputs.
- Multi Variable Text – Allows adding multiple dynamic values or longer paragraphs of text.
- Table – Used to insert tabular data, useful for structured information like item lists or reports.
- Line – Adds a straight line for visual separation or decoration.
- Rectangle – Draws a rectangular shape to highlight or frame specific sections.
- Ellipse – Draws an oval or circular shape for emphasis or design.
- Image – Lets you insert images such as logos, stamps, or other visuals.
- SVG – Allows adding Scalable Vector Graphics for custom shapes, icons, or illustrations.
- Signature – Provides a field for digital signatures.
- QR – Inserts a QR code that can be scanned to redirect to a link or display information.
- Date/Time – Displays both the current date and time together.
- Date – Adds a date field to select or display a date.
- Time – Adds a time field to select or display time separately.
- Select – Provides a dropdown list to choose from predefined options.
- Check Box – Allows users to select one or multiple options using checkboxes.
- Radio Group – Lets users select only one option from a group (e.g., Yes/No).
- EAN 13 – Inserts an EAN-13 barcode, typically used for product labeling.
- CODE 128 – Adds a Code 128 barcode, commonly used for logistics, inventory, and scanning systems.
Usage in User Mode
Once configured and saved:
- The generated PDF templates will be available under user mode.
- When viewing submissions (e.g., via Mantine Table’s Edit button), users can access or download the generated PDF output linked to their submission data.