Workflow Tab
The Workflow tab allows you to automate and manage the sequence of actions that occur after a form submission.
It provides a centralized interface to create, configure, and monitor workflow processes that define how data moves across systems, users, and actions.
Workflows help streamline form operations by connecting actions such as:
- Approvals and rejections
- Notifications and alerts
- Data transfers between systems
- Conditional logic or automated updates
By using workflows, you can transform static forms into interactive business processes that respond dynamically to user input or submission status.
Creating a New Workflow
- Navigate to the Workflow tab of your form.
- Click the Create Flow button at the top-right corner.
- A modal will appear prompting you to enter a Flow Name.
- After typing the name, click Create.
- The new workflow will now appear in the list.
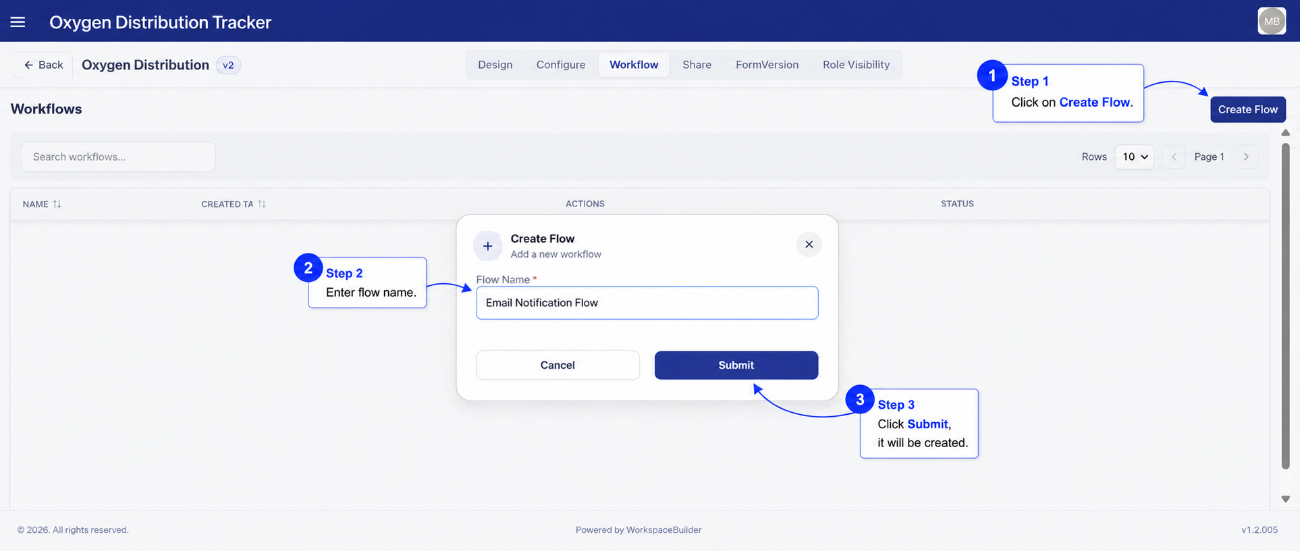
💡 Tip: Use clear names (e.g., “Approval Flow” or “Notification Flow”) to easily identify workflow purpose.
Editing an Existing Workflow
Each workflow entry includes an Edit option.
- Click Edit to reopen the same modal window.
- Update the flow name as needed.
- Click Save to apply your changes.
This feature allows you to easily rename or adjust workflows without recreating them.
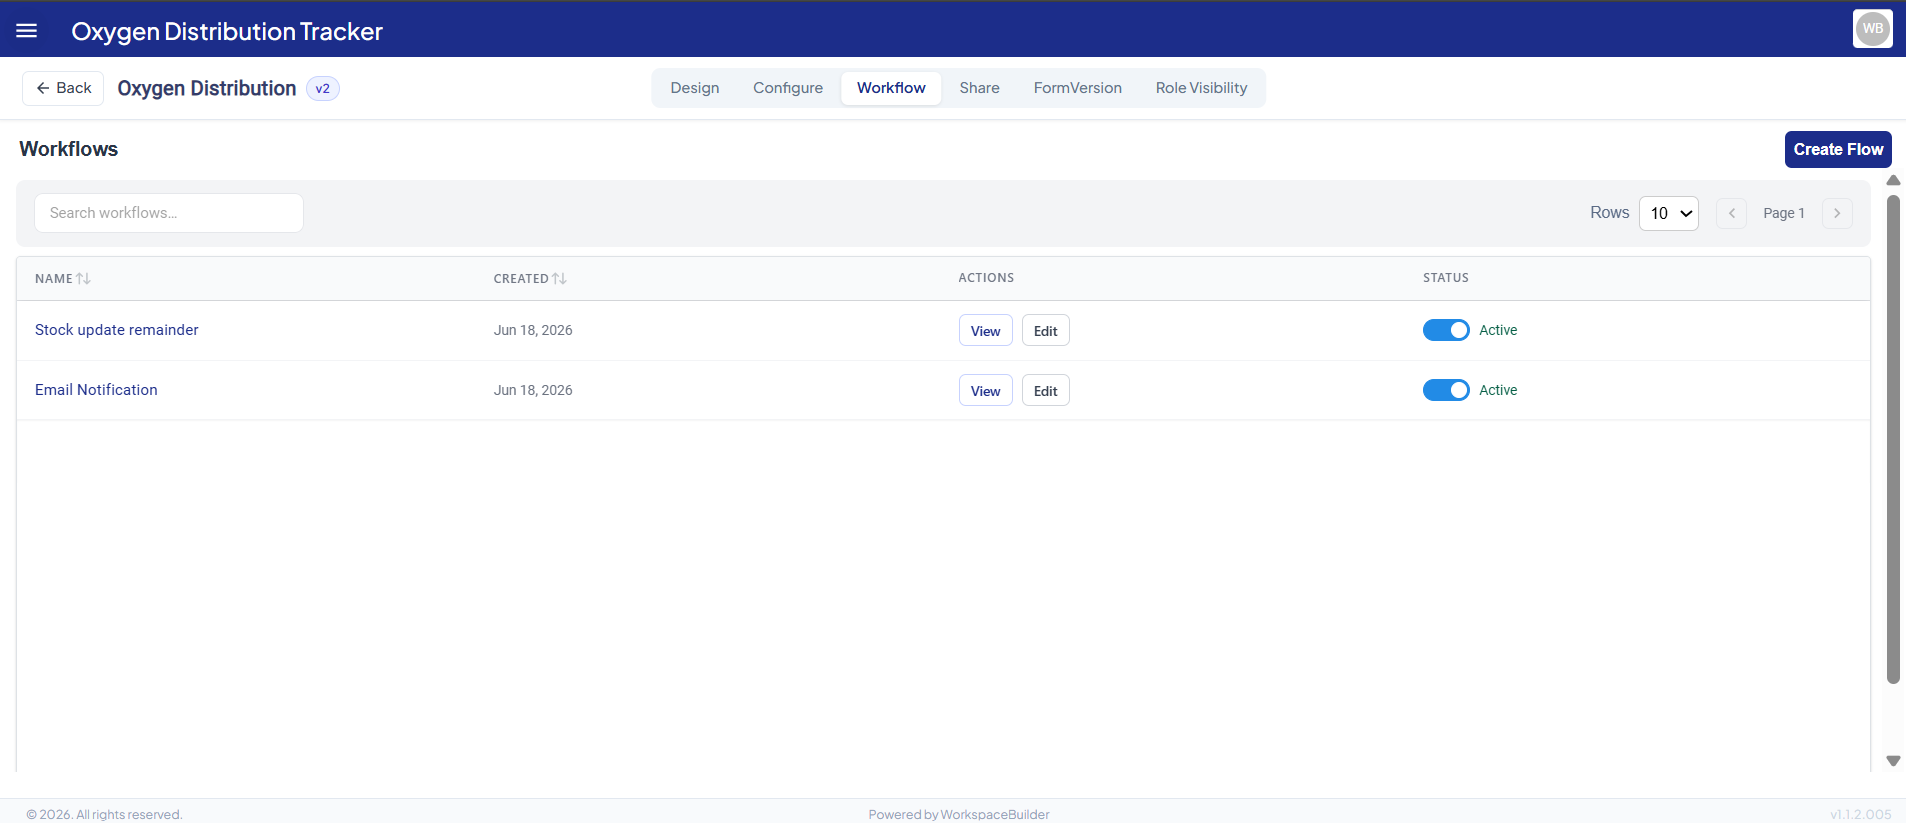
Viewing a Workflow
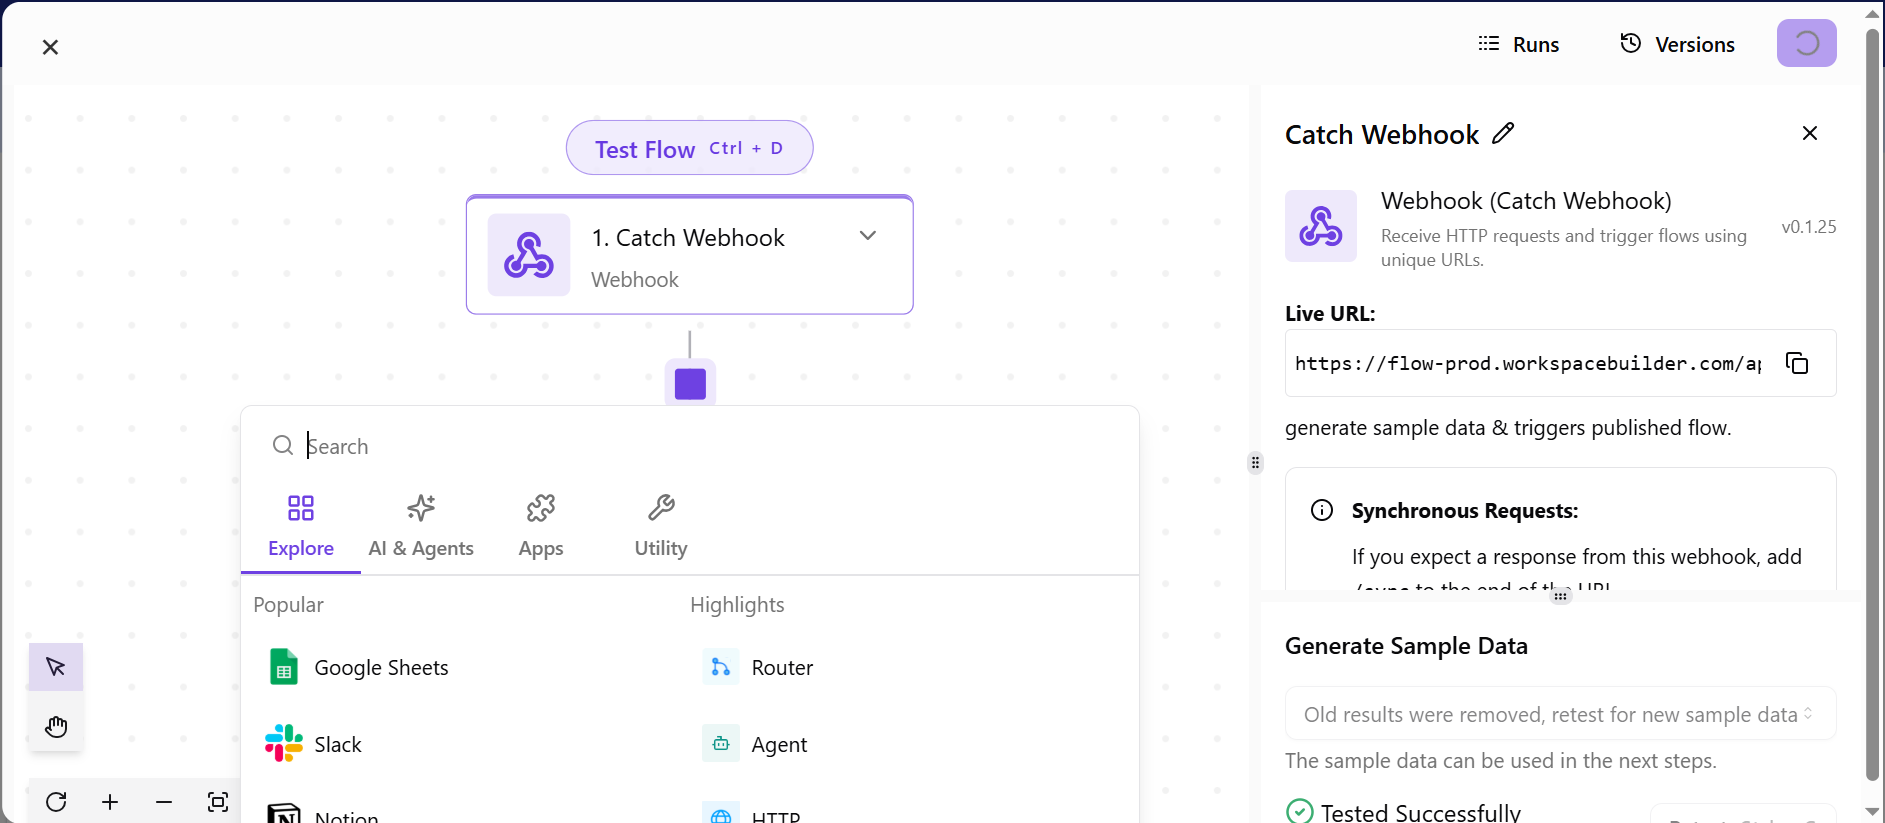
- Click the View button next to a workflow entry.
- The workflow will open inside an embedded interface (iframe) that displays the complete workflow UI.
- Within this view, you can explore connected steps, actions, and automation paths visually.
This interface provides a clear, interactive representation of how the workflow operates behind the scenes.
Workflow Management Table
| Column | Description |
|---|---|
| Name | The name of the workflow. |
| Created | The date and time when the workflow was added. |
| Actions | Buttons for editing or viewing the workflow. |
| Status | Indicates whether the workflow is active or inactive. |
What You Can Do
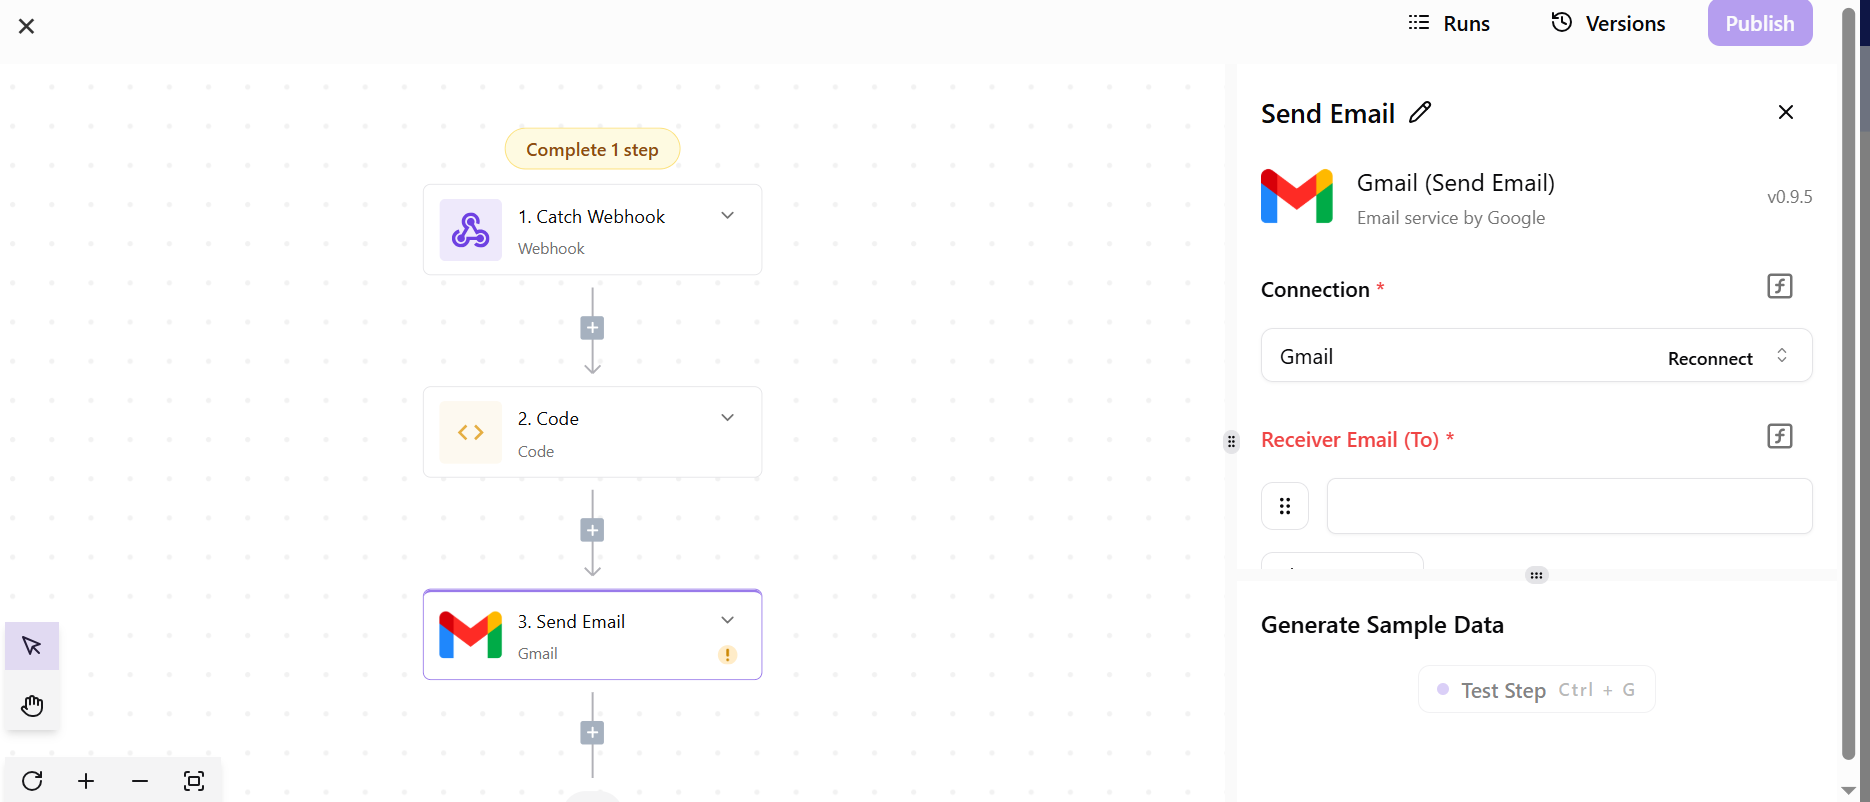
- Create New Workflows: Define actions that trigger on specific form events (e.g., submission, approval, status change).
- Configure Workflow Steps: Add steps such as sending an email, creating a record, calling an API, or updating data.
- Organize Workflow Logic: Define dependencies, conditions, and flow order between steps.
- Monitor & Manage: View all workflows linked to a specific form in one place.
Example Use Case
Form Type: Leave Application Form
| Step | Action | Description |
|---|---|---|
| 1 | Submission Trigger | Workflow starts when an employee submits the leave form. |
| 2 | Manager Approval | The system sends an approval request to the employee’s manager. |
| 3 | Notification | Once approved, the HR team receives a confirmation email. |
| 4 | Database Update | Leave status and dates are recorded in the employee database. |
This automation eliminates manual follow-ups and ensures each step occurs seamlessly.
Tip
Each form can have multiple workflows — for example:
- One for approvals,
- Another for notifications, and
- A third for data synchronization with external systems.
You can view and modify all workflows associated with a form directly within the Workflow Tab.
Summary
| Feature | Description |
|---|---|
| Purpose | Automate post-submission processes |
| Interface | Unified workspace to manage all workflows |
| Key Benefits | Saves time, reduces manual errors, improves efficiency |
| Supported Actions | Approvals, API calls, notifications, data sync, custom logic |
Next Step:
Explore how to configure a workflow step — define triggers, select actions, and set up logic to automate your form’s behavior.