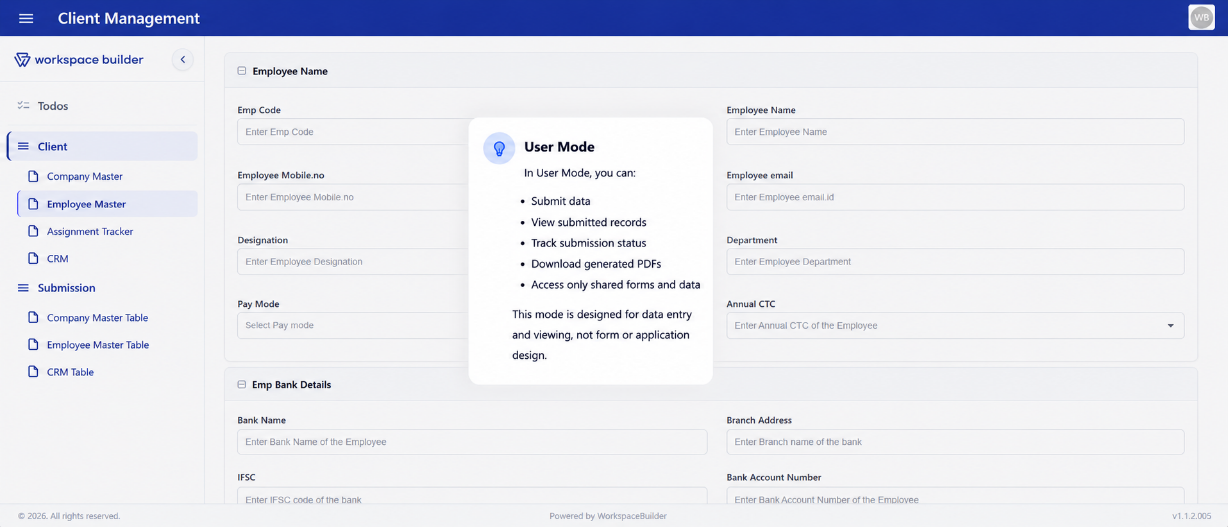
User Mode
User Mode is the runtime environment for end users. It lets them submit data through forms, manage their submissions, update statuses, and download PDF reports. Users cannot create or modify form designs — they only interact with what designers have published.
Page Layout
The User Mode page has three main zones:
| Zone | Description |
|---|---|
| Left sidebar | Menu list — organizes forms under collapsible menu groups |
| Main content area | Renders the selected form or dashboard view |
| Right slide-in panel | Opens for creating or editing a single submission |
On mobile devices the layout changes: a MobileTopBar replaces the left sidebar and submissions appear as cards instead of a table.
Menu and Form Navigation
Forms are organized under menu groups. When a project opens, the first visible menu and its first form are selected automatically.
- Each menu group can hold multiple forms.
- Clicking a menu expands it and shows the forms under it.
- Selecting a form loads it in the main area and fetches its existing submissions.
- Forms are ordered by
formOrder; menus are ordered bymenuOrder.
Access control: If a user does not have permission to view a project or form, an Access Denied toast is shown and the form list is cleared.
Form Rendering
The selected form is rendered using Form.io in the main content area.
Role-Based Visibility
Form components are filtered at render time based on the user's workspace roles. Components the user's role is not allowed to see are hidden before the form mounts.
Device Access Control
Each form can be restricted to specific device types (desktop, tablet, or mobile). If the current device is not allowed:
- A "Incompatible View" warning toast is shown.
- The user is navigated back to the previous page.
Dashboard Display
If a form is configured with display: "dashboard", the main area renders a Remote Dashboard View instead of a standard form. This is a federated micro-frontend component loaded dynamically.
Submission Management
Users interact with their submissions through the main table (or cards on mobile) and the slide-in sidebar panel.
Creating a New Submission
- Click the New / Add button (or a custom button configured on the form).
- The right slide-in panel opens with a blank form.
- Fill in fields and click Submit.
- On success, the table refreshes automatically.
Tip: After submission, the submitted profile data can be displayed and managed using the Advance Data Table component. Add it to any form to list, filter, edit, and export user profile submissions in User Mode.
Editing an Existing Submission
- Click a row in the table (or the edit icon on a card).
- The slide-in panel opens pre-filled with the saved data.
- Modify fields and click Submit.
- The table refreshes and the panel closes.
Deleting a Submission
- Click the delete icon on a row or card.
- A confirmation dialog appears.
- Confirm to permanently remove the submission.
Nested Forms and Stacked Sidebar
Forms can embed references to other forms. When a nested record is opened (via a Mantine table row, a button, or a linked form component), the sidebar stacks — the current panel is saved and a new panel opens on top.
- A back arrow restores the previous sidebar layer.
- Closing the sidebar fully clears the entire stack.
- Nested records support both view-only and edit modes.
Status Management
Each submission has a status (e.g., Submitted, Approved, Rejected). Users with the appropriate role can update the status directly from the submission view.
Updating a Status
- Click the current status label on a submission.
- The sidebar opens showing a status dropdown.
- The status list loads in pages of 10 — scroll to Load More to see additional options.
- Select a new status and save.
- A comment can optionally be added when changing the status.
PDF Download
PDF templates linked to a form can be downloaded from the submission view.
Downloading a PDF
- Click the PDF icon on a row, card, or inside the sidebar.
- A PDF Templates modal opens listing all templates available for that form.
- Click Download PDF next to the desired template.
- The PDF is generated from the submission's data and downloaded immediately.
PDF Template Modal
| Element | Description |
|---|---|
| Template name | Display name of the PDF template |
| Form name | The form the template belongs to |
| Download PDF button | Triggers generation and download |
| Load More | Loads the next page of templates (10 per page) |
What Gets Embedded in the PDF
The PDF generator populates the template schema with submission data. Supported field types in PDF templates:
| Type | Behaviour |
|---|---|
| Text | Filled from submission field value |
| Multi-variable text | Variables substituted from submission data |
| Table | Rows populated from array submission data |
| Image | Resolved from S3 via signed URL, converted to base64 |
| Signature | Shown or hidden based on pdfSignatureMode and assigned user email |
| QR Code / Barcode | Value taken from submission field |
| Date / Time / DateTime | Taken from submission or defaults to current date/time |
Signature Fields in PDF Mode
Signature components can be configured with a pdfSignatureMode:
| Mode | Behaviour in main form | Behaviour in sidebar |
|---|---|---|
edit | Always hidden | Shown only to the assigned user, and only when editing |
hidden | Always hidden | Always hidden |
always | Always visible | Always visible |
If a signature has an assignEmail set, only the user whose email matches can see and fill it in the sidebar.
File Uploads
File uploads in forms are stored in S3. The upload interceptor automatically attaches the required auth headers (Authorization, x-organization-name, x-project-name, x-project-id) to every S3 upload request.
Todos
A Todos panel is available within the User Mode page for task tracking tied to the project. It is rendered as a separate section alongside the main form content.
Mobile User Mode
On small screens the layout switches to a mobile-optimized view:
- MobileTopBar replaces the desktop left sidebar
- MenuComponent provides the navigation drawer
- SubmissionCards replaces the data table with swipeable cards
- All core actions (create, edit, delete, PDF, status) remain available via card action buttons