Users
The Users section lists all members who have been invited to this project and lets Admins invite new users, assign roles, and remove access.
Viewing Project Members
The users table displays all members currently associated with this project. Each row shows:
| Column | Description |
|---|---|
| Name | First and last name of the user |
| Registered email address | |
| Role(s) | One or more roles assigned to this user within the project |
| Actions | Options to edit role assignments or remove the user |
The list supports search and pagination (20 users per page by default).
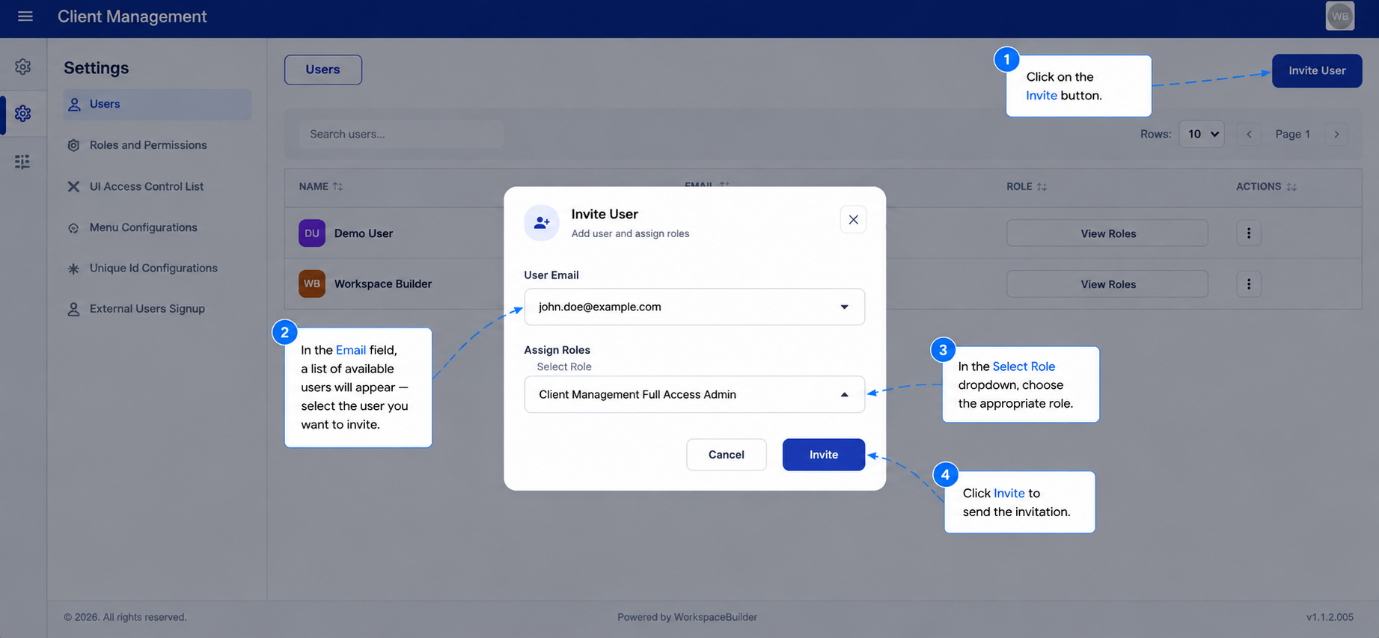
Inviting a New User
- Click Invite User (or the + button) to open the invite modal.
- Search for or enter the user's email address.
- Select one or more roles to assign from the dropdown.
- Click Send Invite.
 The invited user receives an email notification. They appear in the table immediately with a Pending status until they accept.
Only users who already have a workspace account can be invited to a project. To add a brand-new user to the workspace first, use Workspace User Management.
Editing a User's Roles
- Click the three-dot menu (⋮) on the user's row.
- Select Edit Roles.
- Add or remove roles in the slide-in panel.
- Click Save to apply the changes.
Removing a User
- Click the three-dot menu (⋮) on the user's row.
- Select Remove.
- Confirm the action in the confirmation dialog.
Removing a user revokes their access to this project immediately. Their workspace account and membership in other projects are not affected.